DIY Dog Bed with Shiplap (Step-by-Step Guide from My Build) 2026
Written By:
I’ve built a few pet projects over time, but this DIY dog bed with shiplap is one of those builds that actually stayed useful in my home instead of becoming just another “nice idea.” It looks like real furniture, it’s strong enough for daily use, and my dog immediately claimed it as his spot.
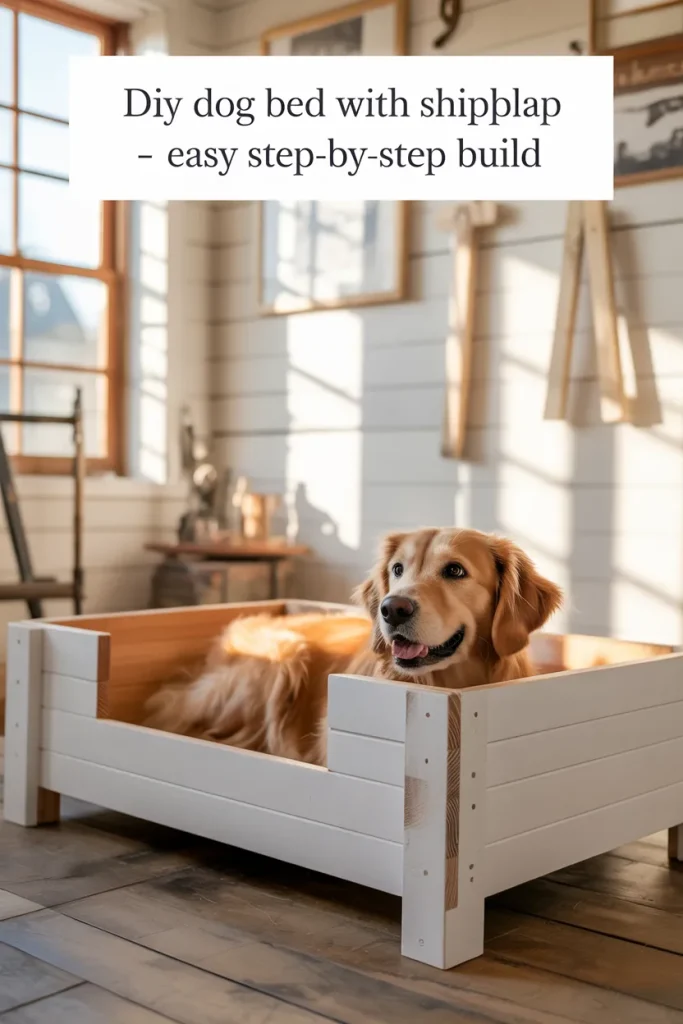
What I liked most is that it doesn’t look like a typical pet bed. It blends into the room instead of sticking out, which was honestly my main goal from the start.
Quick Summary & Key Takeaways
- DIY dog bed with shiplap gives a furniture-style, modern look
- Much cheaper than premium store-bought wooden pet beds
- Basic tools like a saw, drill, and nailer are enough
- Custom sizing makes it easy to fit any dog cushion
- Shiplap adds strength but requires careful measuring and cutting
- Finishing work (sanding + paint) changes everything in the final look
Final Dimensions of the Dog Bed

I always start by measuring the cushion first, not guessing the frame size.
My final build came out around:
- Length: 37 inches
- Width: 29 inches
- Height: 8 inches
If your dog is larger or smaller, adjust the frame before you cut anything. That one decision saves a lot of wasted material later.
Materials You’ll Need

Here’s what I used in my build:
- Pine boards (1×6, 1×8, 1×4, 1×2)
- Wood glue
- Pocket hole screws (1¼ inch)
- Brad nails (1 inch and 1¼ inch)
- Wood filler or spackle
- Large dog cushion
If budget is tight, you can use cheaper lumber for hidden support parts and save premium boards for visible areas only.
Tools Required
You don’t need a professional workshop, just basic DIY tools:
- Miter saw
- Drill
- Pocket hole jig
- Brad nailer
- Clamps
- Measuring tape and square
Clamps are something I initially underestimated, but they make alignment much easier when assembling the frame.
1. Make Initial Lumber Cuts for the Dog Bed Frame
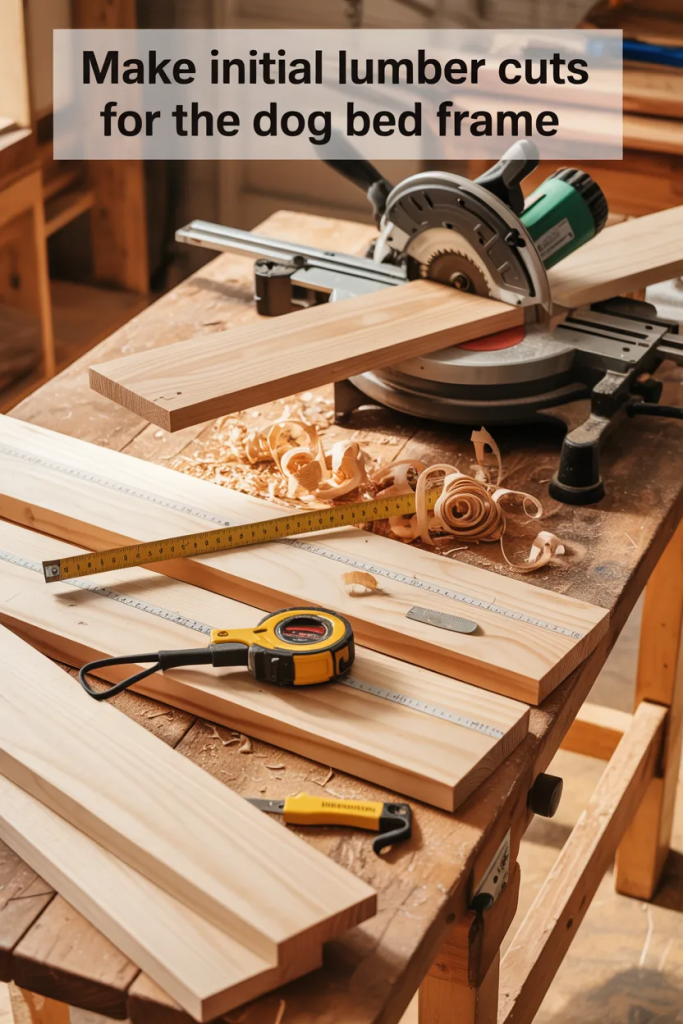
This step is all about accuracy.
I carefully measured and cut boards for:
- Side panels
- Front sections
- Back panel
Even a small cutting error here affects the entire structure later. I learned that the hard way on an earlier build, so now I take my time here.
2. Assemble the DIY Dog Bed Frame
This is where the bed starts taking shape.
I used pocket holes and wood glue to assemble everything. First the front, then sides, and finally the back.
One thing I noticed: keeping pocket holes facing outward (so they get hidden later) makes the final finish cleaner and more professional.
Dry fitting everything before final screws helped me avoid alignment issues.
3. Cut and Attach the Shiplap Boards
This is the part that defines the whole look of the project.
I first laid everything out on the floor before attaching anything. That helped me figure out spacing and where custom cuts were needed.
Front Installation

The front required the most planning. Some shiplap pieces needed trimming to fit around corners and openings properly.
Instead of rushing, I marked everything carefully before cutting.
I attached boards using wood glue and brad nails, working slowly from one side to the other to maintain alignment.
Sides and Back
Once the front was done, the sides felt easier.
I continued the same method:
- Glue
- Nail
- Check alignment
Corners required custom cuts, and I took extra time here because these are the spots that become obvious if done poorly.
4. Cut and Install the Additional Bottom Supports

This part is often ignored, but I consider it essential.
I added bottom support boards so the cushion doesn’t sag over time.
Without these supports, larger dogs can quickly wear down the base. This step adds long-term durability.
5. Cut and Install the Trim
Trim completely changes how the project looks.
I added trim to:
- Top edges
- Front opening
- Back panel
Once installed, the bed started looking like real furniture instead of a basic wooden frame.
One thing I noticed is that even simple trim makes the build look significantly more expensive than it actually is.
6. Prep and Paint
This stage is slow but important.
I:
- Filled all nail holes
- Sanded rough edges
- Applied primer where needed
- Painted two coats of white finish
Skipping prep makes paint look rough and uneven, so I didn’t rush this part.
A smooth finish depends more on prep work than paint quality itself.
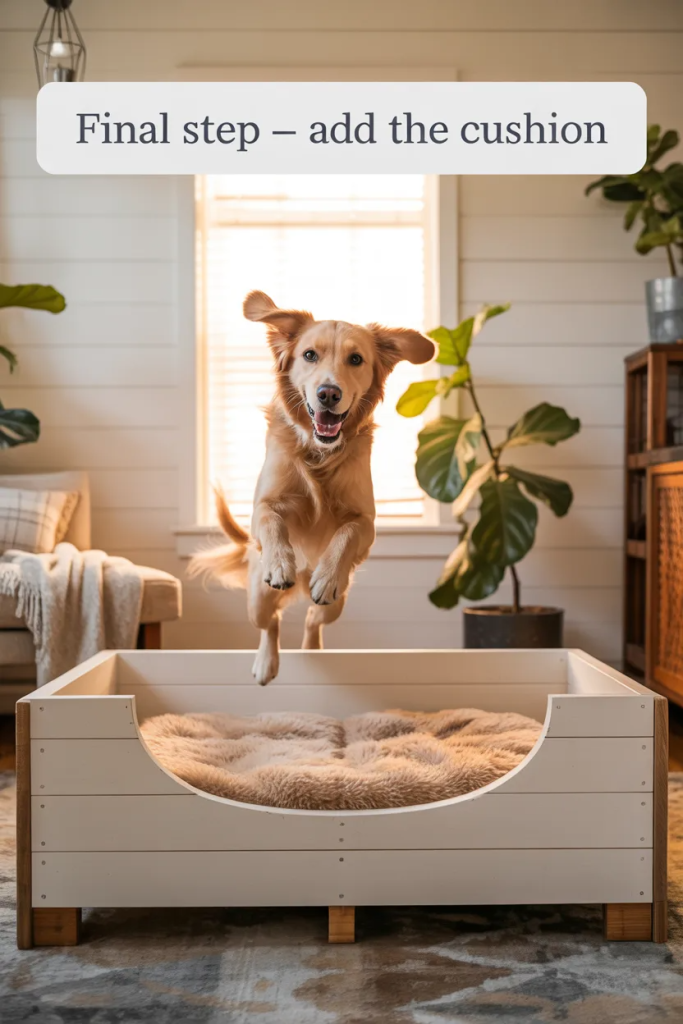
7. Add the Dog Cushion to the Frame
Is This DIY Dog Bed Worth It?
This is the final step, and honestly the most satisfying one.
Once everything dried, I placed the cushion inside the frame. My dog didn’t even hesitate—he jumped right in and made it his spot.
That moment made the whole build worth it.
My Honest Experience After Building It
After using this DIY dog bed with shiplap for a while, a few things stood out:
It’s stronger than fabric beds and doesn’t collapse over time. Cleaning is easy because it’s just wood—no washing required. It also fits better with home furniture compared to typical pet beds.
If I were to rebuild it, I’d slightly round the edges for extra safety and comfort.
Pro Tips from My Build
- Always measure cushion before building frame
- Lay shiplap layout before attaching anything
- Use clamps for proper alignment
- Sand before painting for a smooth finish
- Don’t rush corner cuts—they define the final look
Common Mistakes to Avoid
- Building without cushion measurements
- Skipping bottom supports
- Rushing shiplap installation
- Ignoring sanding and surface prep
- Poor alignment at corners
Is This DIY Dog Bed Worth It?

From my experience, yes.
It takes effort, but you get:
- A custom-sized dog bed
- A strong, long-lasting structure
- A design that actually matches your home
And honestly, seeing your dog use something you built yourself makes it more rewarding than just buying one.
FAQ,s
What is a DIY dog bed with shiplap?
A DIY dog bed with shiplap is a handmade wooden pet bed built using shiplap-style boards for a clean, modern furniture look instead of a soft fabric bed.
Is it cheaper to build a dog bed yourself?
Yes, in most cases it costs 40–60% less than high-end store-bought wooden dog beds, especially if you already have basic tools.
What size should I make a DIY dog bed?
The size depends on your dog’s sleeping cushion. Always measure the cushion first and then add a small allowance for comfort.
Do I need advanced woodworking skills for this project?
No, basic DIY skills are enough. If you can measure, cut, drill, and use a nail gun, you can build it with patience.
What type of wood is best for a dog bed?
Pine is commonly used because it’s affordable, easy to work with, and strong enough for a dog bed frame.
How long does it take to build a DIY dog bed?
For most beginners, it can take 1–2 days depending on experience level and drying time for paint or glue.
Is shiplap necessary for a dog bed design?
No, but shiplap improves both durability and appearance, giving the bed a more stylish, furniture-like finish.
How do I clean a wooden dog bed?
You can simply wipe it with a damp cloth. For cushions, use removable washable covers for easy cleaning.
Can I customize the design for my dog?
Yes, you can adjust size, height, color, and even add storage underneath depending on your needs.
What is the biggest mistake to avoid when building a dog bed?
The most common mistake is not measuring the dog cushion first, which leads to sizing problems and poor fit.