Peanut Butter & Oat Pinwheels For Dog: A Simple and Fun
You know that look your dog gives you — the soft eyes, the hopeful tail wag, the quiet little “I’ve been good, haven’t I?” energy. That look is basically a request for something special. Instead of grabbing another bag of processed treats, we can actually make something that feels special for them and feels good for us too.
These peanut butter and oat pinwheels are one of those rare things that look impressive, feel fun to make, and are genuinely good for your dog. They don’t require fancy tools, weird ingredients, or baking skills. They just require a little time, a little care, and the willingness to do something homemade for a creature that gives you unconditional love every single day.
They look like bakery-style treats, but they’re made in your own kitchen, with ingredients you already recognize and trust. That alone changes how you feel about giving treats — it stops being “just a snack” and starts being an intentional act of care.
Why These Treats Actually Matter
They’re Designed for How Dogs Really Eat
The spiral shape isn’t just for looks. It makes these treats easy to break into smaller pieces, which is perfect for training, portion control, or sharing between multiple dogs. You’re not stuck giving a big treat when your dog only needs a little reward.
The combination of oats and peanut butter gives slow, steady energy instead of a quick sugar rush. That means your dog feels satisfied, not hyper, not crashy, and not hungry again five minutes later.
They Support Real Health, Not Just Taste
These pinwheels support digestion, help maintain a shiny coat, and contribute to overall wellbeing simply because they’re made from clean, simple foods. There are no fillers, no artificial colors, no preservatives — just basic ingredients that your dog’s body knows how to handle.
From your dog’s perspective, they feel like dessert. From your perspective, they function like a nutritious snack. That balance is what makes them smart treats instead of just cute ones.
They’re Budget-Friendly and Guilt-Free
Everything in this recipe is affordable and commonly found in a home kitchen. That means you’re not paying premium prices for branding or packaging — you’re paying pennies for actual food. And there’s a different kind of satisfaction that comes from knowing you made something yourself instead of pulling it off a shelf.
Your Shopping List (Yes, It’s Really This Simple)
You don’t need a long, complicated list. You don’t need to hunt for specialty items. You don’t need to wonder what half the ingredients mean.
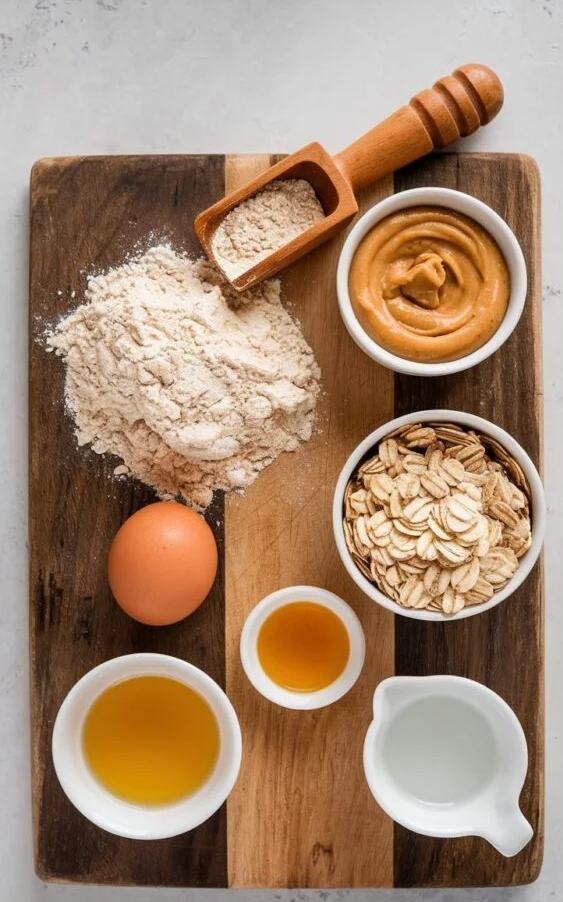
You’re using:
Whole wheat flour for structure and fiber
Rolled oats for texture and steady energy
Natural peanut butter for flavor and healthy fats
Water to bring everything together
Honey for optional sweetness and binding
An egg to help everything hold together during baking
That’s it. Six ingredients. Each one has a purpose. Each one is familiar. Each one plays a role in making the dough workable, the treats tasty, and the texture just right.
Let’s Make Some Pinwheels
Preparing the Dough
You start by preheating your oven and preparing your baking trays so nothing sticks and cleanup stays easy. Dry ingredients go together in one bowl, wet ingredients in another, and then everything is combined into a dough that should feel firm, flexible, and not sticky.
If it feels too dry, a splash of water fixes it. If it feels too wet, a little flour balances it out. This dough is forgiving — it doesn’t punish you for small mistakes.
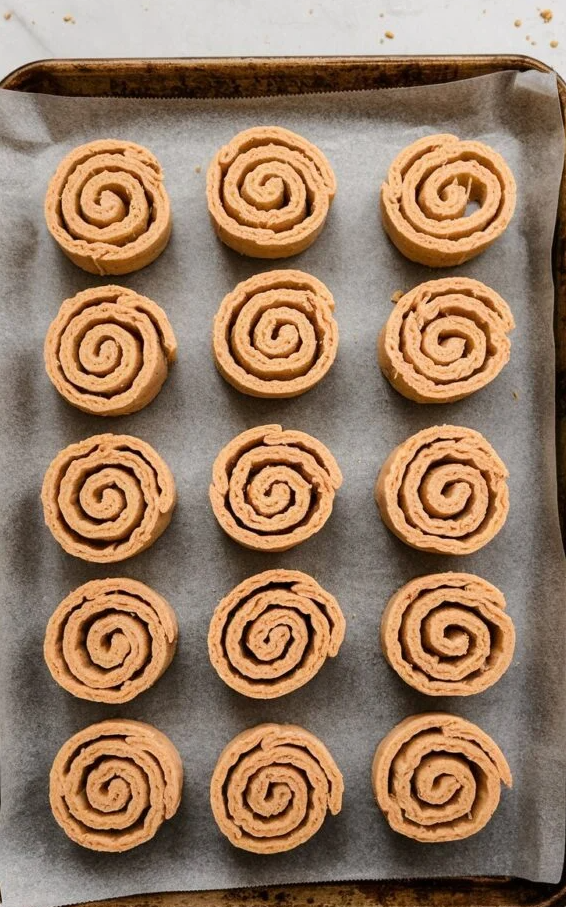
Creating the Pinwheel Shape
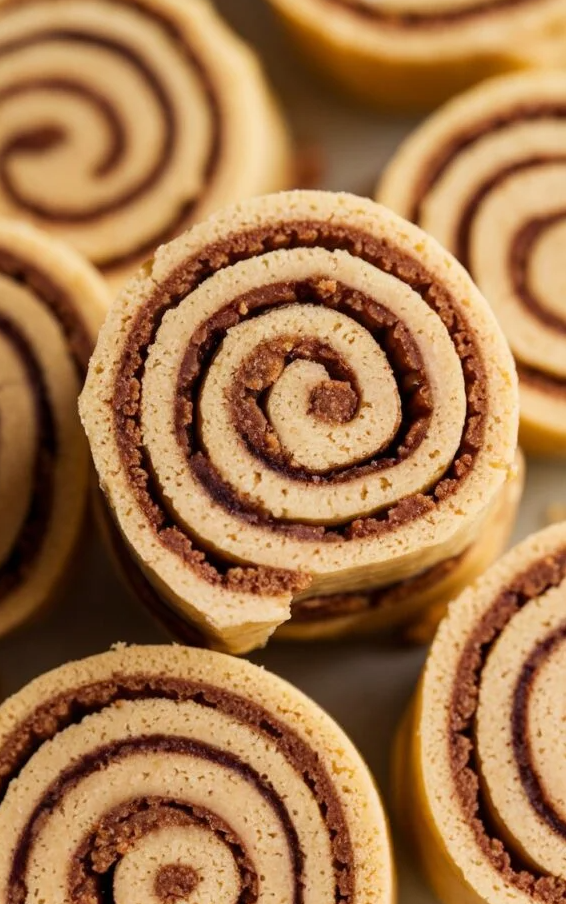
The dough is rolled out into thin sheets, layered together with a thin filling in between, and then rolled into a log shape. This is what creates that spiral pattern once sliced.
The chilling step is what makes slicing clean and easy. It’s not optional. It’s what turns soft dough into something that behaves nicely under a knife.
Baking and Cooling
Once sliced, the pinwheels go into the oven until they’re lightly golden and firm. After baking, they need time to cool so they fully crisp up. Warm treats are always softer than cooled ones, so patience here directly affects the final texture.
After cooling, they’re ready to be stored, shared, and admired.
Ways to Customize Without Complicating
Flavor Boosts
You can add fruit like banana, vegetables like pumpkin, or herbs like parsley to slightly change flavor and nutrition without changing the basic method.
Texture or Dietary Changes
You can use different flours for gluten sensitivity, add a light layer of cheese for protein and scent, or adjust moisture levels slightly depending on what you add.
The base method stays the same — only the personality of the treat changes.
Common Mistakes and How to Avoid Them
Skipping the chilling step makes slicing messy.
Using unsafe peanut butter can be dangerous.
Rolling too loosely makes pinwheels fall apart.
Slicing too thick causes uneven baking.
Not letting them cool fully leaves them soft instead of crunchy.
Each of these is easy to avoid once you know what matters.
Questions You Might Be Wondering About
You don’t need special equipment. Mixing by hand works fine.
Dogs on diets can still enjoy them in smaller portions.
You know they’re done when they’re firm and lightly golden.
Vegetables work best when finely grated and moisture is removed.
Every batch looks slightly different and that’s completely normal.
Conclusion of Peanut Butter & Oat Pinwheels For Dog
There’s something emotional about making food for someone you love — even when that someone has four legs and fur. These pinwheels aren’t just snacks. They’re effort. They’re attention. They’re the physical version of “I care about you.”
Your dog doesn’t care that they’re spiral-shaped or that you followed a recipe. Your dog cares that you gave them something made by you. And honestly, that’s the part that matters most.
So yes, your counter might get a little floury. Your oven might run for a while. But what you get in return is a dog who feels spoiled, loved, and very, very happy — and that’s always worth it.