7 Essential Tips to Keep Your Dog’s Ears Clean and Healthy at Home
Keeping your dog’s ears clean is an important part of their overall health. When ears aren’t cared for, dirt and wax can build up and cause problems that make your dog uncomfortable.
The good thing is that ear cleaning doesn’t have to be hard or scary. With a gentle approach and the right tools, you can help keep your dog’s ears fresh and healthy. The tips below explain how to clean ears safely and when to ask a vet for help.
1. Know When (and When NOT) to Clean
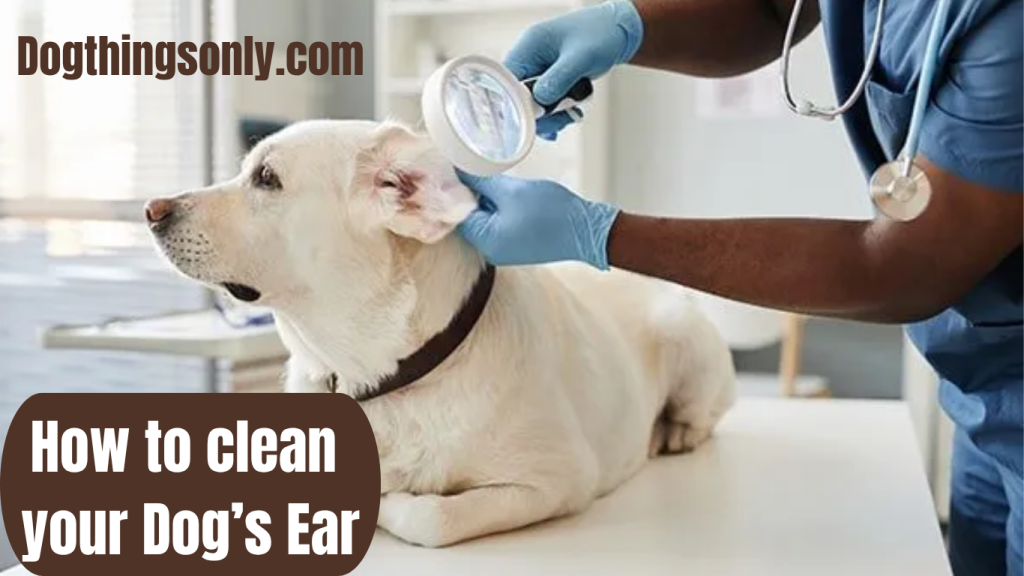
Cleaning your dog’s ears too often can do more harm than good. Ears should only be cleaned when they look dirty, smell unusual, or have visible wax. It’s also helpful to clean them after your dog swims or takes a bath to remove extra moisture. If you see any redness, swelling, or strange discharge, stop right away and contact your vet. These signs can mean an infection, and cleaning at home may make things worse. Checking your dog’s ears every week helps you stay aware of any changes. Healthy ears usually look pink, dry, and have no strong smell.
2. Use the Right Tools
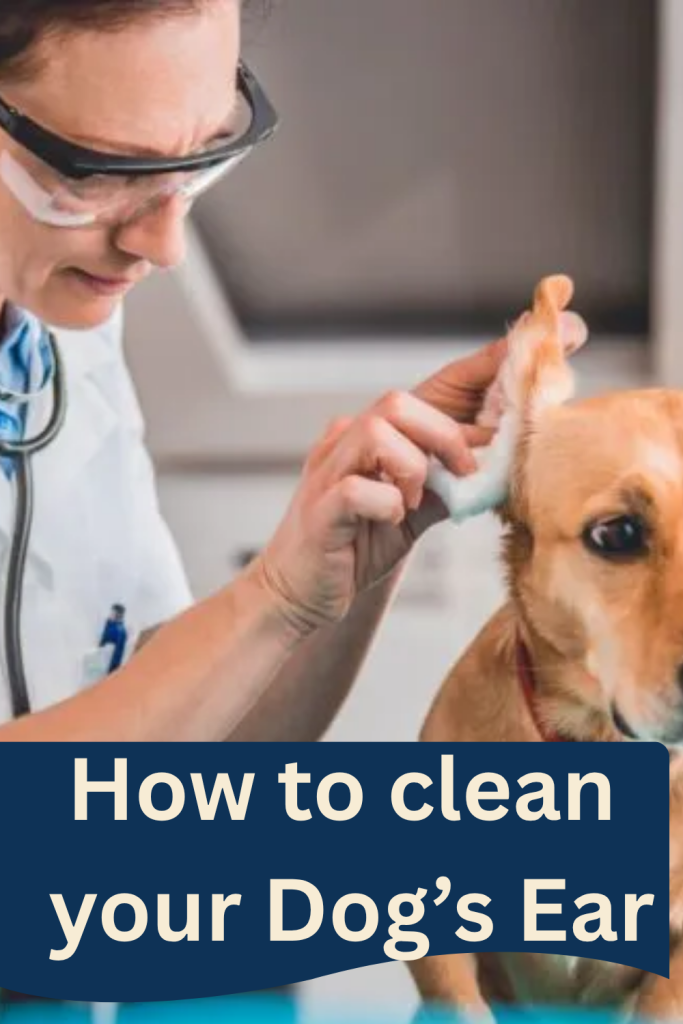
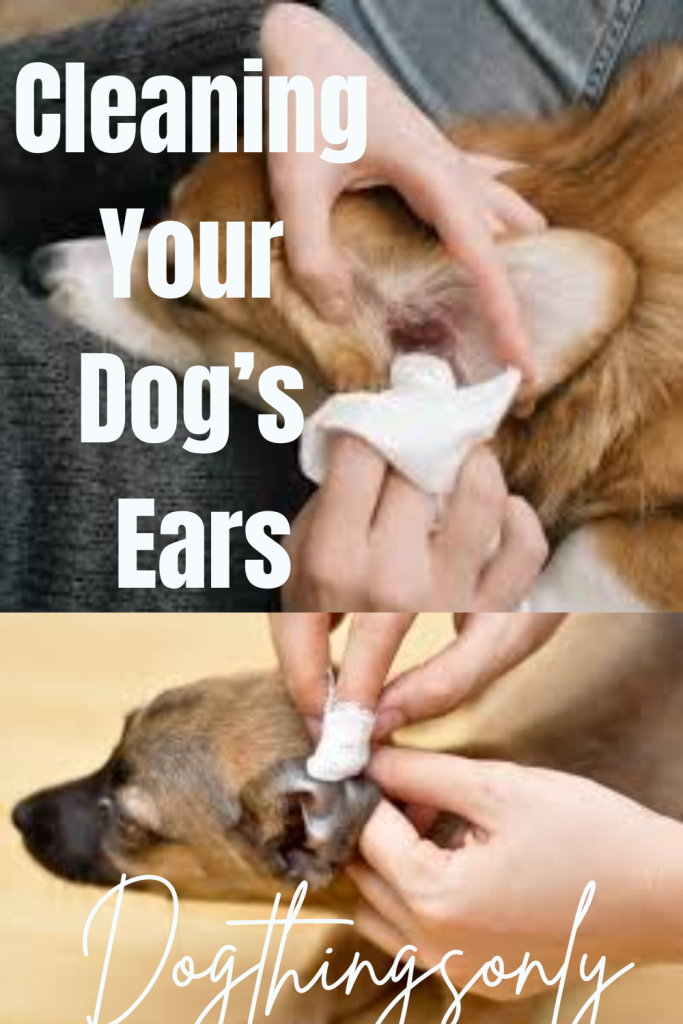
The supplies you choose make a big difference when cleaning ears. Always use an ear cleaner made specifically for dogs, since other products can irritate the skin inside the ear. A good dog ear cleaner helps soften dirt and wax so it can be removed easily. Cotton balls or soft pads are best for wiping because they are gentle. Avoid cotton swabs, as they can push debris further inside the ear. Keep a towel nearby, because dogs often shake their heads during cleaning. After you finish, giving your dog a treat helps make the experience positive.
3. Get Your Dog Comfortable
A calm dog makes the whole process smoother. Pick a quiet place where your dog won’t be distracted. Start by softly rubbing their ears or offering a treat so they feel safe and relaxed. This helps your dog understand that ear cleaning is nothing to fear. If your dog tends to wiggle or pull away, having someone gently hold them can help. Taking a few moments to prepare your dog makes ear cleaning feel more like routine care instead of something stressful.
4. Apply the Ear Cleaner the Right Way
To use the cleaner correctly, lift your dog’s ear flap so you can reach the ear canal. Add the amount recommended on the bottle, but don’t let the tip touch the ear. Keeping the bottle clean helps prevent germs from spreading. Once the cleaner is inside, gently massage the base of the ear for about half a minute. This helps loosen wax and dirt. You might hear a soft squishing sound while doing this — it’s completely normal. Speaking calmly during this step helps keep your dog relaxed.
5. Let Them Shake It Out
After the cleaner is applied, your dog will naturally want to shake their head. This shaking helps move the loosened debris to the outer part of the ear, making it easier to wipe away. It can get a little messy, so stand back and hold your towel ready. Even though it might look funny, this step is helpful for clearing the ears and improving airflow inside the ear canal.
6. Wipe Away the Gunk
Once your dog finishes shaking, use a cotton ball or pad to gently wipe the outer ear and the inside of the ear flap. Remove any dirt, wax, or leftover cleaner that has come to the surface. Be gentle and never put anything deep inside the ear canal. Continue wiping until the area looks clean and dry. If the debris seems too stubborn or your dog reacts as if something hurts, it’s better to talk to your vet instead of trying to clean deeper on your own.
7. Reward and Repeat
When everything is done, praise your dog and offer their favorite treat. This teaches them that ear cleaning is a positive experience. How often you need to clean the ears depends on your dog’s lifestyle and ear shape. Dogs with long or floppy ears usually need more frequent cleaning, while others may only need it every week or two. Keeping a regular schedule helps prevent irritation and keeps your dog comfortable.
Bonus Tips for Success
If you have a puppy, start touching and checking their ears early so they become used to the process. Always watch for warning signs like redness, strong odor, or discharge, and contact your vet if you notice anything unusual. After baths or swimming, gently dry the ears with a soft towel to keep moisture from building up. Simple habits like these help protect your dog from future problems and support overall ear health.
Final Thoughts: Dog’s Ears
Cleaning your dog’s ears doesn’t have to be complicated or stressful. With a little patience, the right supplies, and a calm approach, it can become a normal part of your grooming routine. Clean ears help your dog stay comfortable, cheerful, and healthy. Take your time, be gentle, and make ear care a moment of comfort and connection with your pet.